TestNG provides a testing framework to test the application. TestNG framework can be used to write unit test, integration as well as functional tests. Our objective in this blog will be to understand and implement TestNG framework while automating with Selenium WebDriver using eclipse.
In the previous article, we explained how to install TestNG libraries with eclipse. In this article, we will explain how to create first TestNG test in eclipse.
Pre-Requisite: We have installed TestNG as discussed in previous article.
Steps to create first TestNG test in eclipse:
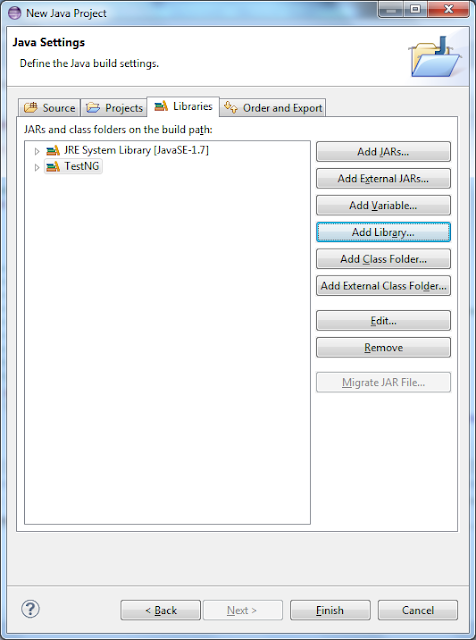
- Create a new Project in eclipse as shown in the image below and add the TestNG library:
 |
| Add caption |
- Once we have added the library, we can use the library in our test.
Creating a testNG Class in the java Project:
A testNG test is executed based on the testNG annotations in the TestNG class.
Below code will be generated once we click on finish.
 package testNG;
 import org.testng.annotations.Test;
 import org.testng.annotations.BeforeTest;
 import org.testng.annotations.AfterTest;
 public class NewTest {
  @Test
  public void f() {
  }
  @BeforeTest
  public void beforeTest() {
  }
  @AfterTest
  public void afterTest() {
  }
 }


Creating first TestNG test using eclipse for Selenium WebDriver is well explained article
ReplyDeleteSelenium Training Institute in Chennai